We’ve picked five of our best exercises for diastasis recti.
Watch the video, follow the instructions and start incorporating them into your routine today!
The best exercises for diastasis recti reconnect and re-align your whole core muscle system. To narrow a diastasis gap, you don’t need to do more or harder isolated abdominal exercises. Instead, we need whole-core stabilizing exercises.
Here are our top 5 exercises for diastasis recti that do exactly that.
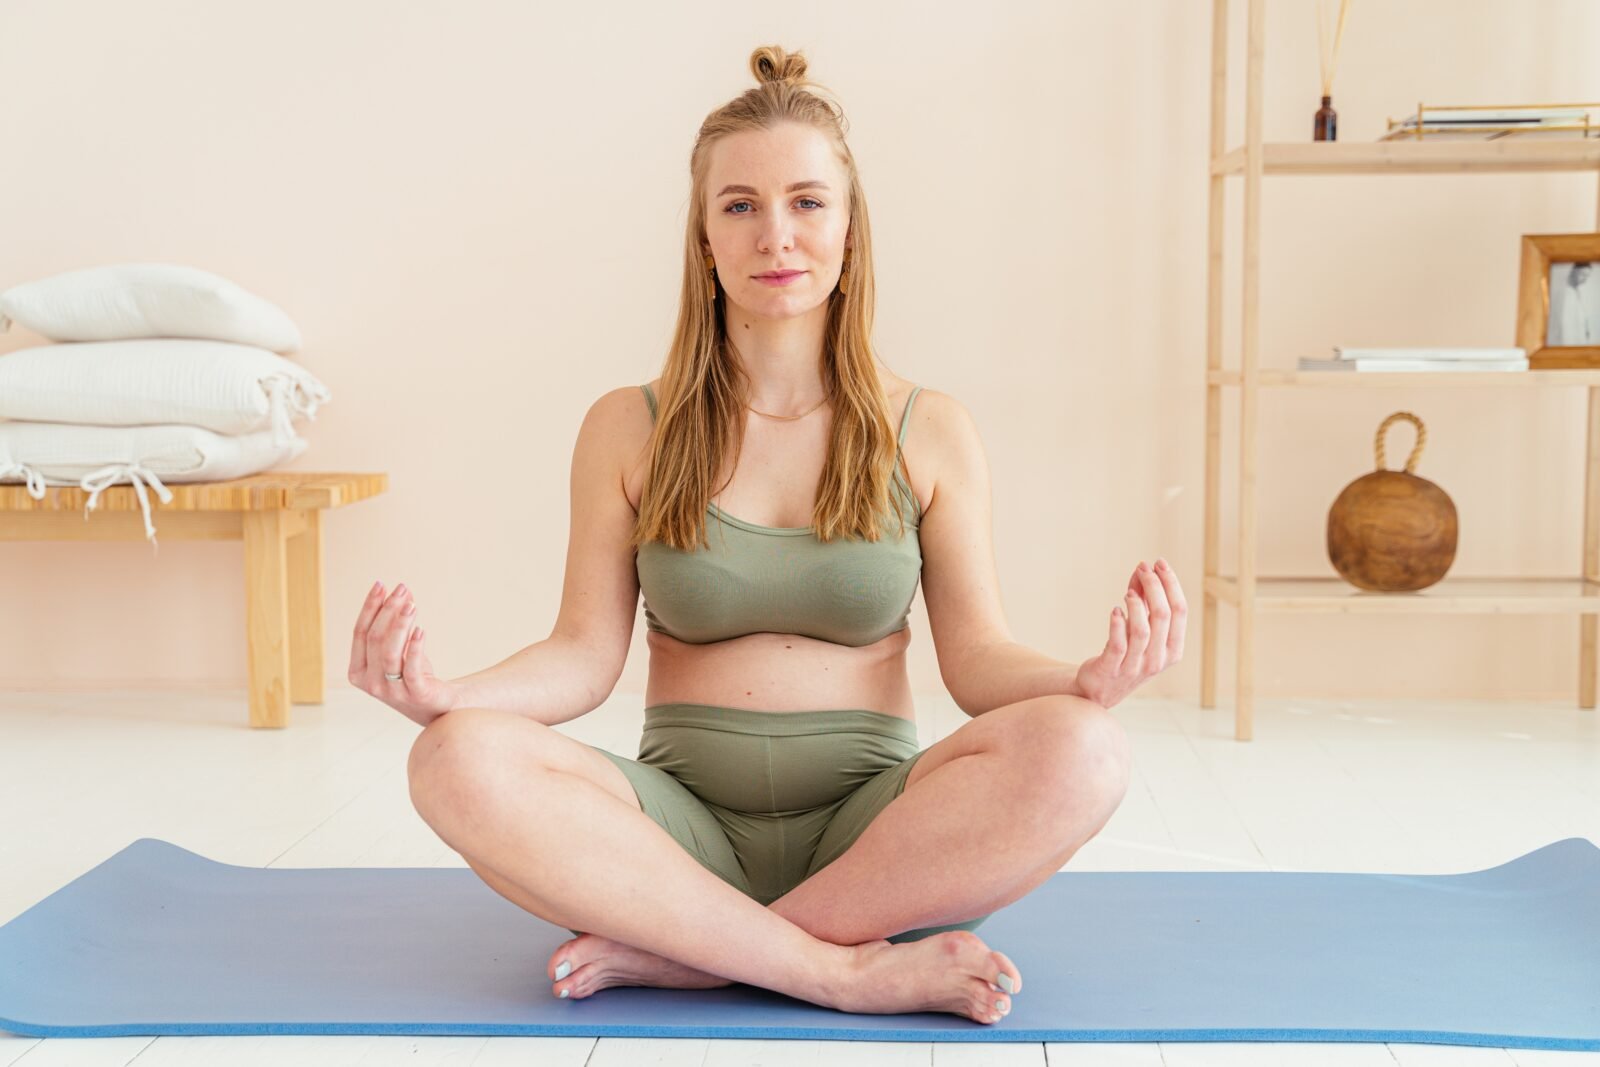
The MUTU Breath™️
This is the foundation for diastasis healing. The perfect way to connect mind to muscle and kickstart a mindful reconnection of your entire core muscle system to heal diastasis recti.
How to do the MUTU Breath:
- Get comfortable, sitting or on your back
- Sit in a comfortable position, cross-legged on a pillow or block, on a big pilates ball, or lay down on your back.
- Place a hand on your lower stomach to bring in a tactile connection.
- Take a couple of deep breaths to relax and center.
- Drop your ribs and your shoulders.
- Exhale and focus on lifting your pelvic floor, feeling that gentle tension in your core as you do.
- On your next inhale, focus on relaxing your body (no tension anywhere!)
- Repeat for 5 cycles of breath.
Connection breaths are the perfect warm-up for every diastasis recti exercise.
Heel Drop
Heel drops are one of the most effective abdominal reconnection exercises in our workout program. This key core recovery exercise can help narrow your diastasis recti, build pelvic floor strength and increase core strength.
Back-lying exercises are an important first stage of healing, as it place the least pressure or gravity on the core. We start here, but we soon move to upright, prone and all fours positioning to increase the load the muscles must resist.
How to do the Heel Drop:
- Lie on your back on the mat.
- Place the pillow under your upper shoulders and head and feel your ribs settle down towards the floor.
- Your knees should be bent up and your feet flat on the floor.
- One first and then the other, bring your knees in towards your chest so they’re resting at 90 degrees. There should be no strain at all to hold them there so if your abs are straining to hold them in position, bring them in a little closer.
- Now exhale as you draw your abs inwards and slowly drop one heel to touch the floor.
- Rest your heel on the floor as you inhale, then exhale and bring it back.
- Breathe into the back of your rib cage, then exhale and engage as you drop the other heel slowly.
- Rest, let go and breathe in.
- Then exhale, engage and bring it back.
- Keep going, moving slowly with your breath. Always moving on the exhale, resting on the inhale. Your lower abdomen should draw gently in as you exhale and engage. If it bulges outwards at all, stop, regather and try again.
- Remember, always inhale and relax as you rest. Exhale, and engage as you move.
- Keep going in time with your own breath.
- Do 5-8 drops on each leg, nice and slow.
Heel drop modifications
Heel drops are a key core recovery exercise that we love. But we’re sometimes asked for modifications based on mom’s fitness levels, physical condition or specific needs. If you find your abs straining to hold your knees up in the stat position, first try bringing them in a little close to your chest to reduce the strain.
Here are some further ideas to modify the Heel Drop exercise from certified MUTU Pro and Doula, Heather:
Certified MUTU pro and Doula Heather takes us through 2 modifications for the Heel Drop exercise.
- Heel slide
- Adding pillows to reduce range of motion
Kneel and Squeeze
This is a great diastasis recti exercise, and the upright but stable position is important to ensure we’re working the exercise dynamically. This one is awesome for engaging the deeper core muscles and improving pelvic floor control from a more upright poistion
It’s beneficial for healing a diastasis recti but also for any moms working on their core and pelvic floor health more generally.
How to do the Kneel and Squeeze:
- Kneel on your mat with a pillow between your legs for comfort.
- You’re going to do five MUTU breaths but with some extra work on your core.
- Hold the ball at your chest, between your palms.
- Relax your shoulders and drop your ribs.
- Exhale and engage your deep core muscles and pelvic floor as you squeeze the ball between your palms.
- Each time you inhale, release the pressure on the ball and elax.
- Squeeze, lift your pelvic floor, exhale, engage
- Relax and release.
- Each time you inhale, release the pressure on the ball and fully relax and open.
- Each breath out, engage abs and plevic floor and squeeze the ball and then relax and inhale.
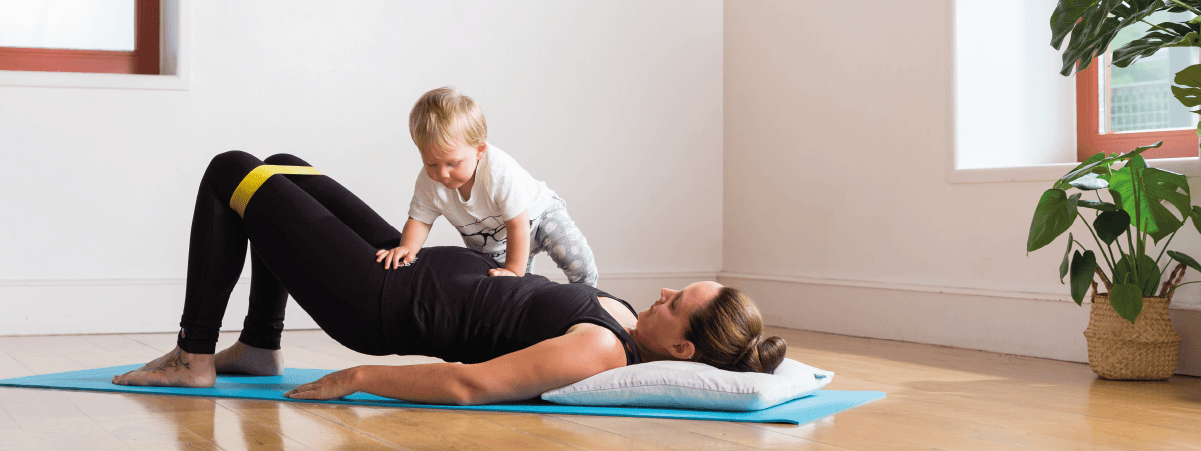
Lift Your Hips
This exercise is sometimes known as a ‘glute bridge’ and is great for working the muscles of your butt. You need strong glutes for a functional core – it’s all connected 🙂
The difference is that we will be focussing less on a forceful glute squeeze, and more on the core gently engaging on the exhale and lift.
How to do Lift Your Hips
- Lie on your back on the mat with your head and neck relaxed.
- The backs of your ribs should be relaxed and resting towards the floor.
- Feet are as wide as your sit bones and flat on the floor, knees bent up and toes pointed straight ahead.
- Place arms by your side, palms facing up (or down if your shoulders aren’t comfortable rotating).
- Inhale to prepare, then on an exhale, push through your heels and drive your hips upwards.
- Your butt will squeeze a little which is fine, but keep your focus on abs gently drawing in, and pelvic floor drawing up.
- Stay in the raised position as you inhale, then exhale, engage and roll back down.
- Try not to arch your back.
- You’re aiming for a straight line from knee to hip to shoulder.
- Do three more in your own time.
- Remember every time you move, you exhale and engage your core.
- As you stay in one position, you inhale and relax.
- Raise your hips, exhale, inhale, maintain slight engagement.
- Exhale, roll down. Each time, lift, inhale, exhale, exhale again as you move back down.
- And relax.
Note, if you feel all the work in your hamstrings (backs of thighs), move your feet in closer to your butt.
If you feel your lower back working or arching, return to the starting position and reposition your back to maintain a neutral core position.
Lamp-post Pee (mini version!)
This exercise kind of looks like the movement of a dog relieving itself at a fire hydrant or lamp post!. It’s incredible great for engaging the core, improving your posture and enhancing balance.
How to do the mini Lamp Post Pee:
- Roll over if you’re coming from the last back lying exercise, and come up to kneeling on the mat.
- Poisiton yourself on all fours, shoulders over wrists, hips over knees, spine neutral
- Now you’re going to exhale and engage your core muscles as you lift one knee just off the floor. It literally only has to leave the floor to work, don;t come up to high or twist your body.
- Inhale and relax.
- Exhale, engage and lift the other knee.
- Keep going, alternating each side, exhaling and engaging core and drawing in pelvic floor as you raise one knee just off the floor.
- Your knee has to just leave the floor for this exercise to work.
- Each time, bring it back down to rest as you inhale, then repeat on the other side as you exhale and engage.
- Think about your spine staying in neutral.
- Don’t tuck your tailbone.
- Don’t tuck your head under.
- Exhale, engage and lift.
- Relax, inhale and lower.
- Each time, engage your core as you raise your knee from the floor, and then lower back down and rest.
- Come back to kneeling to finish.
Bonus Moves!
Here’s a couple of bonus moves, modifying the Kneel and A Squeeze and increasing the range of movement of the mini Lamp Post Pee.
High Kneel and Squeeze
How to do a High Kneel and Squeeze:
- Grab a small pilates ball, a pillow or a child’s soccer ball – anything will do so long as you can hold it between your palms and it’s got some ‘squidge’.
- Hold between your palms in front of your chest.
- Now kneel up high so you’re not sitting on your heels.
- You’re going to exhale and engage your deep muscles and pelvic floor as you squeeze the ball between your palms.
- Each time you inhale, release the pressure on the ball and fully relax and open.
- In your own time, to your own breath, squeeze, exhale, engage pelvic floor and core.
- Inhale, release and fully open.
- Feel your pelvic floor draw up inside as you squeeze on the ball and exhale.
- Everything relaxes as you inhale. And relax.
Full Lamp Post Pee
How to do the full Lamp Post Pee:
- Roll yourself onto your front and bring your knees in underneath and come onto all fours.
- Inhale to prepare and then exhale and engage your core and pelvic floor as you lift one knee out to the side and then back down.
- Inhale and then repeat to the other side- exhale, engage and move.
- Keep going in time with your own breath. Exhale, engage as you lift. Inhale and relax as you rest.
- Alternate sides.
- You don’t need to lift your leg too high, just up and to the side.
- Stabilizing your torso and engaging your core everytime you lift your leg. Relaxing everytime you lower.
- Lift, engage, exhale. Relax and inhale. Exhale, engage and lift, inhale and relax. Exhale, engage and lift and back to neutral.
- Come back to kneel to finish.
So there you have it, our top five diastasis recti exercises (and a couple bonus advanced moves!) you can feel safe and confident doing at home.
You can sprinkle these into your workout routine, or you can do all five in a row for an awesome diastasis recti focused core workout.


